
The Gradient Editor
We’ve already gone through the finer points of coloring flat-shaded objects in previous chapters; however, when we add a gradient, the options in the Fill and Stroke dialog change to add a useful gradient editor. This can be seen as an alternative or addition to the Tool control bar when the Gradient tool is active. As you can see from Figure 8.15, this combines the usual color-mixing tools we’ve seen before in the Fill tab with the options in the Tool control bar for gradients.
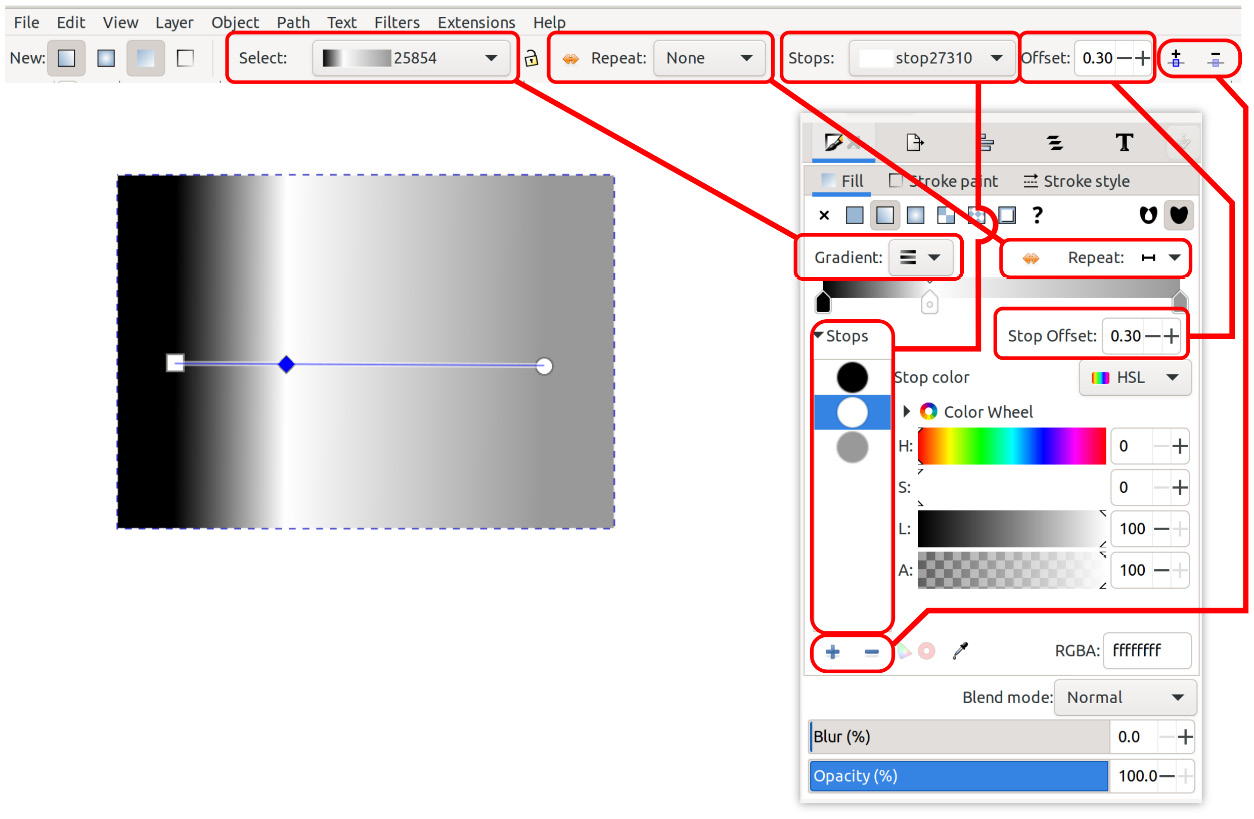
Figure 8.15 – The Gradient Editor in the Fill tab with equivalent features shown in the Tool control bar for the Gradient tool
So, why have all this duplicate functionality packed into the Fill and Stroke dialog? Remember that the Tool control bar options for the Gradient tool are only visible when the Gradient tool is active. By placing this functionality in the Fill and Stroke dialog, we can edit gradients on selected shapes without activating...