
The Menu bar
You’re probably familiar with this bar as it’s a staple of most desktop applications. Whenever you want to find something, it’s usually organized into menus at the top of the screen (see Figure 1.11):
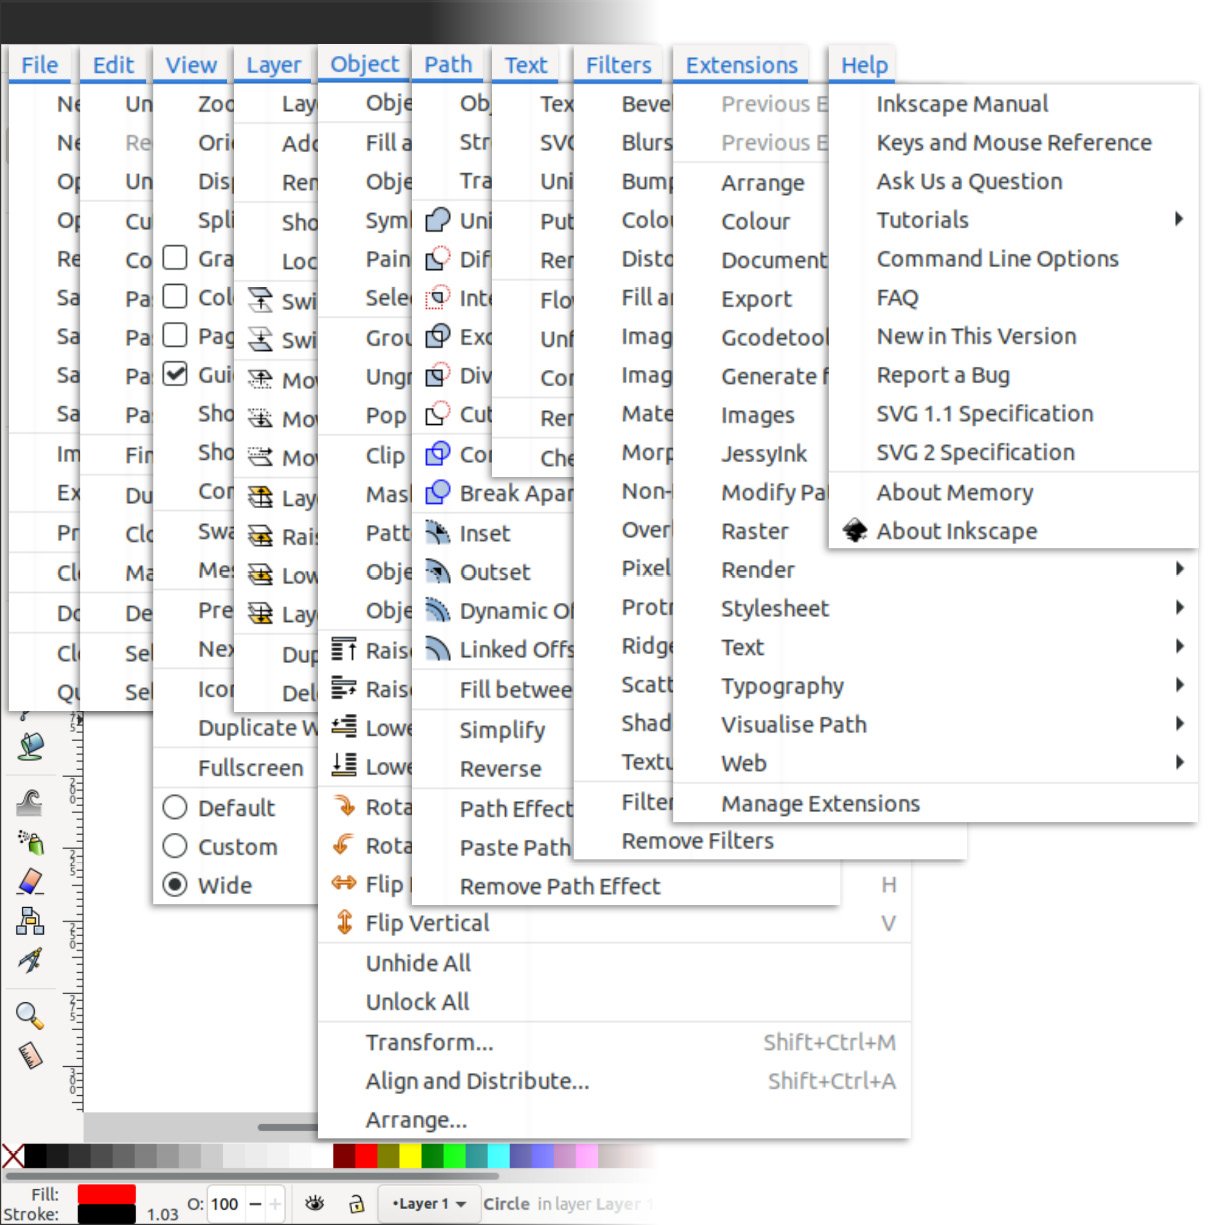
Figure 1.11 – Inkscape’s Menu items
While this certainly seems like a lot of information, you will see that everything is sorted logically, and once you get used to where things are, it will become second nature. For now, here are some examples of the kinds of things you can find in each menu:
- File: Contains entries related to loading and saving files, printing, cleaning up, and changing the properties of your document.
- Edit: This menu contains copy, paste, and select actions, as well as the Inkscape Preferences dialog.
- View: This menu features zoom controls, display modes, and a variety of customization options to show and hide pieces of the Inkscape user interface.
- Layer: This menu houses layer controls and shortcuts. This menu also brings up the Layers dialog. You will likely use the Layers dialog more often than the items in this menu, but they are still a good reference for the hotkeys to raise and lower layers, and so on.
- Objects: This menu includes a myriad of useful tools for interacting with objects, including raising and lowering them in the object stack (more on that later). This menu also brings up the Objects dialog, the Align and Distribute dialog, and the Arrange dialog, all of which we will cover in later chapters.
- Path: This is a veritable toolbox of functions for editing the nodes and curves (lines/strokes) of your shapes, as well as for converting from an object into a path to make shapes editable. There are also useful path operations to add, remove, and cut shapes using other shapes. We’ll spend a good deal of time in this menu as it contains fast ways to get the shapes we want to make without the need to edit them node by node.
- Text: This menu can be used to bring up the Text and Font dialog, attach text to paths, flow text through objects so your paragraphs take on the shape of non-rectangle objects, and, of course, the all-important Check Spelling dialog.
- Filters: In addition to constructing shapes, Inkscape makes it possible to add effects to them. It’s best to use the effects in this menu sparingly for a variety of reasons. However, there are some neat effects here and the ability to build your own, so we’ll have some fun with that later.
- Extensions: Inkscape supports extensions written in the programming language Python. Writing these is beyond the scope of this book, but I’ll take you on a guided tour of the fabulous extensions that come with Inkscape so you can do awesome things such as generate barcodes and QR codes, change the colors of your shapes and objects as you would do in photo-editing software, and so on.
- Help: This menu contains a great collection of quick links for learning Inkscape basics, getting help, and even chatting with Inkscape community members in real time on the Inkscape chat server. The manual is a bit outdated at the time of writing this book but contains a lot of useful information nonetheless.
Note
In this book and online forums, it’s common to use > to indicate the way to get to a menu item. For example, instead of saying “go to the top Menu bar and click on the Edit menu, then click on the Paste Size option, then click on the Paste Width option,” we instead say Edit > Paste Size > Paste Width.
Much easier to read, isn’t it? It’s also easier to type and remember, and generally saves everyone involved a ton of time.
That about wraps it up for the Menu bar. Next, we’ll have a look at the Tool bar and Tool control bar.