
The Align and Distribute dialog
If I may draw your attention to the Align and Distribute dialog, which can be summoned by choosing Object > Align and Distribute or by hitting the magic Ctrl + Shift + A hotkey combination, as shown in Figure 4.1:
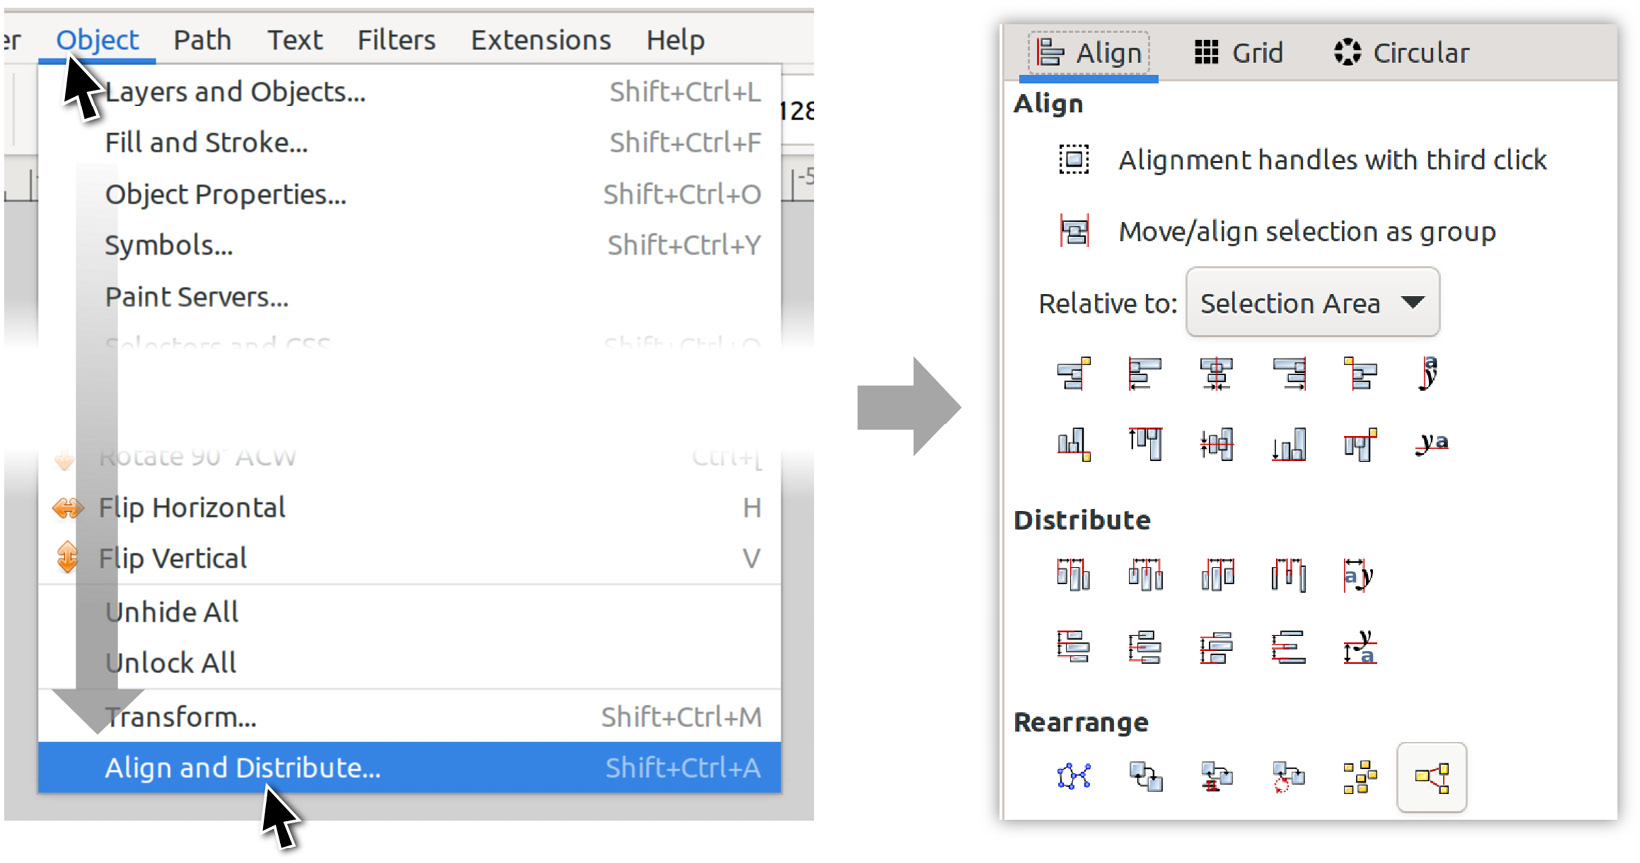
Figure 4.1 – The Align and Distribute dialog
Here, we have a lot of options, but if you look closely at each of the icons, you will see they do exactly what they indicate – the Align section aligns all selected shapes together, while the Distribute section equalizes the spaces between shapes in different ways.
Let’s start with the Align section and see some practical examples.
Say you have a building and some window washers. You’d like to align the window washers to the side of the building so that they aren’t floating out over the street, menacing people with a clear defiance of gravity.
Figure 4.2 shows this scenario and some ways we might use the core Align buttons...