
The Mesh Gradient tool
Like the Gradient tool, this tool allows us to assign and edit gradients on the canvas. Instead of clicking and dragging a gradient, we simply select the Mesh Gradient tool and double-click the flat-color shape we want to assign a mesh gradient to, as shown in Figure 8.17.
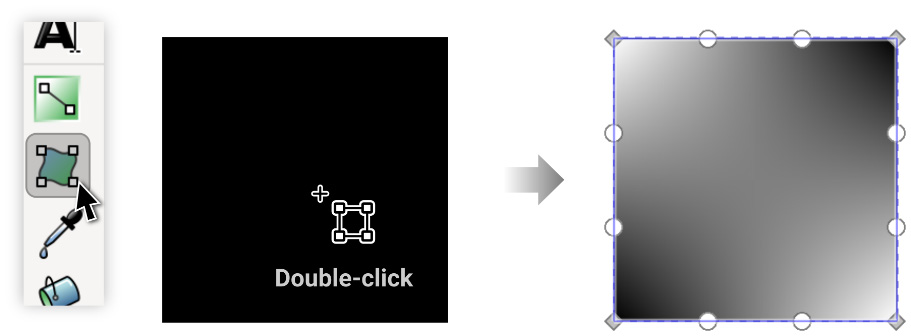
Figure 8.17 – Double-clicking on a black square with the Mesh Gradient tool active
By default, this gives us a 1x1 grid of color stops to work with. As before, we can select one of the diamond-shaped stops and click a swatch to assign it another color. Additionally, Inkscape gives us a set of little circular handles to change the curvature of the gradient between stops, so we can make whatever custom gradient shapes we like.
Figure 8.18 shows the default 1x1 mesh gradient before and after we move around the stops and handles to better fit the shape.
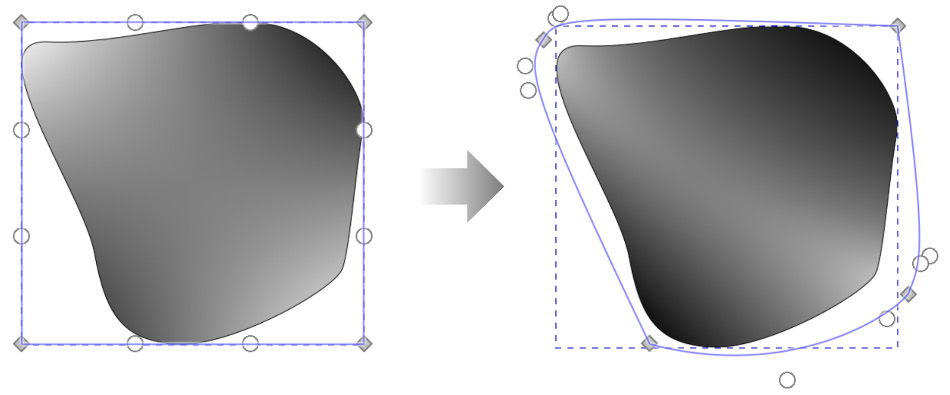
Figure 8.18 – A default mesh gradient edited to fit a non-uniform shape...