
Line styles
Thus far, we’ve been sort of just accepting the fact that our lines cut off sharply and are solid without any breaks unless we manually break them. However, it’s possible to style our lines so that the ends are round or square capped, and our corners are round, sharp, or chamfered. We can do this through the Stroke Style menu.
To access this menu, we can simply click on the Stroke width value in the Fill and Stroke Indicator area in the lower-left corner of the screen. This brings up the Stroke Style tab in the Fill and Stroke dialog, as shown in Figure 5.16:
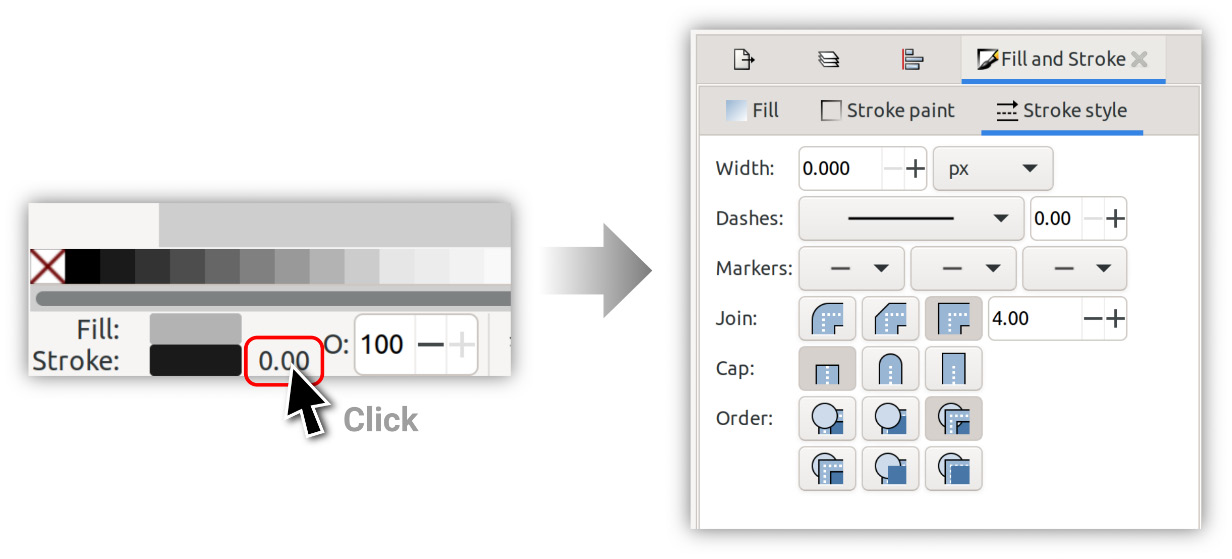
Figure 5.16 – Double-clicking the Stroke value and the resulting Stroke Style tab
Let’s focus on how our corners look first. You can see the Join field, which controls whether our corners are sharp, rounded, or beveled, based on whichever option is toggled on.
As you can see in Figure 5.17, with the Join and Cap fields, we can choose the following:
...