
Breaking and joining lines
Sometimes, we may want to break our closed path to create an opening in the shape. Take, for example, our glass. Maybe we decide that we don’t want the top of our glass to have a stroke, for example.
We can select the top line of the glass and use the Delete Segment Between Two Non-endpoint Nodes button, which henceforth we will simply call the Remove Line button. As you can see in Figure 5.11, this removes both the line and, consequently, the stroke from the top:
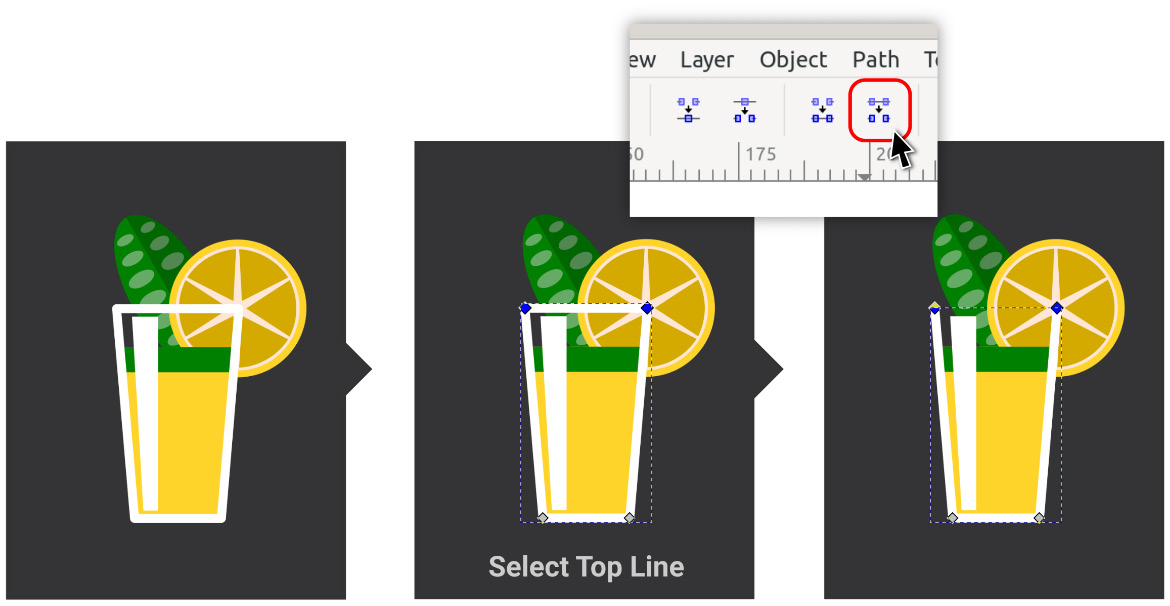
Figure 5.11 – Removing the top edge of our glass
Likewise, we can add it back with the Join Selected End Nodes with a New Segment button (also known as the Add Line button), immediately to the left of the Remove Line button.
You may notice that breaking the shape open in this way may or may not affect the fill of the object. This depends on which parts of the line are disconnected. When the closed shape is broken, Inkscape has to guess which parts...