
Stacking Path Effects
You may have noticed that the Path Effects dialog looks a bit like the Layers and Objects dialog that we saw in the previous chapter. As we add effects, we can see they stack up in a similar fashion. Using our mice as an example, we could add a Bend path effect to bend our whole ring of munching mice, as shown in Figure 12.10.
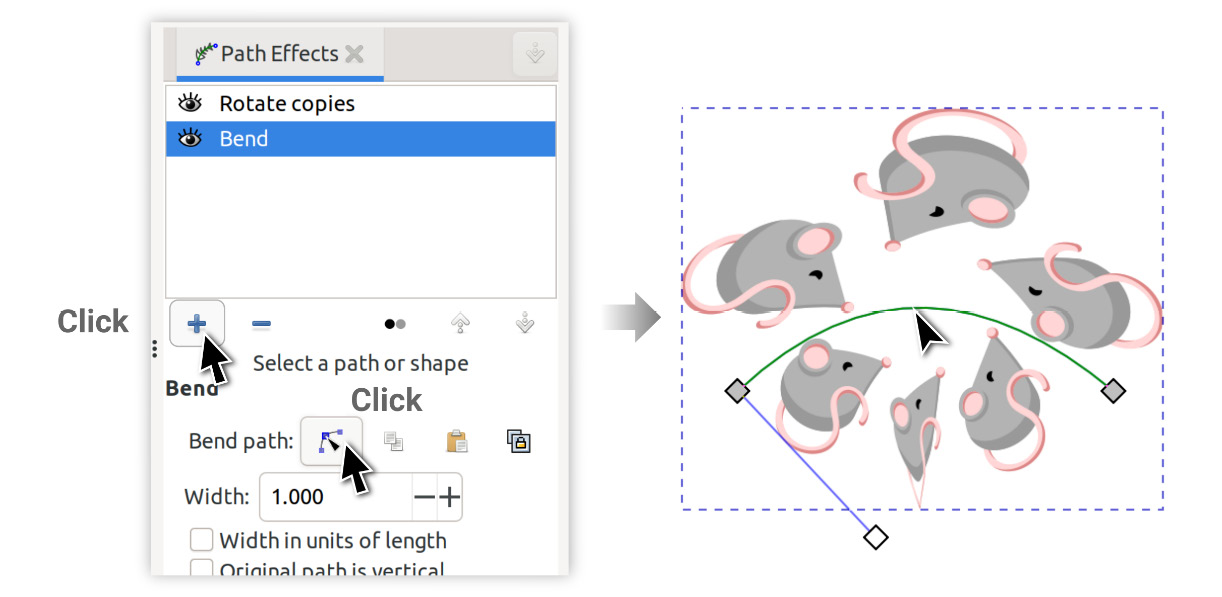
Figure 12.10 – Stacking a Bend path effect with a Rotate copies path effect
It’s a bit more likely that we’d want to bend a single mouse rather than the entire rotational group, however. To do this, we simply need to move the Bend path effect above the Rotate copies path effect.
To do this more easily, collapse Bend by clicking on the little arrow on the left side of the bar, and then click-drag the handle on the right side to move the entry to the top of the list. You will see a small colored indicator at the top of the Rotate copies entry, which shows you where the Bend path effect...