
The Swatch Palette
As shown in Figure 1.16, the Swatch Palette is good for quick coloring. Clicking one of these will fill any selected shape with that color:

Figure 1.16 – The Swatch Palette
Likewise, holding Shift and clicking a swatch will assign a stroke of that color, or you can right-click a swatch and choose Set stroke from the popover menu. Clicking the hamburger menu (the one with three lines) on the far right will give you option to see more colors and switch between palettes. Also, the up and down arrow buttons to the left of the hamburger menu will scroll up and down the available swatches in the currently selected palette, as will hovering the mouse cursor over the swatches and using the mouse wheel.
In Inkscape 1.3, you may notice that the first swatches on the left are larger than the rest. These are pinned colors, and you can add and remove them from this area to save your favorites. Say, for example, you really like the brightest red, and you’d like it to be pinned. Simply right-click on the red swatch and choose Pin color from the menu that pops up, as shown in Figure 1.17.
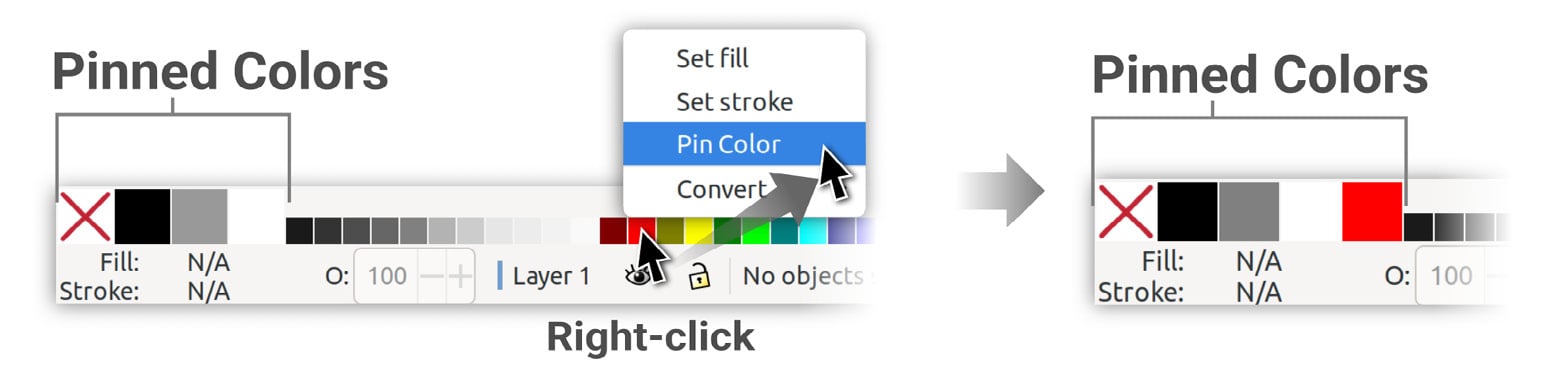
Figure 1.17 – Pinning colors to the Pinned Colors area
The color indicators
The color indicators indicate the Fill and Stroke (outline) colors for the selected shape. These indicators will be blank (and show N/A, which is short for not applicable) until a shape is selected. Clicking the color bar will bring up the Fill and Stroke dialog for more options, as well as a variety of color pickers to choose custom colors.
Right-clicking the color bars will bring up a menu of nice presets, as well as the ability to copy, paste, and swap colors between fills and strokes, as shown in Figure 1.18:
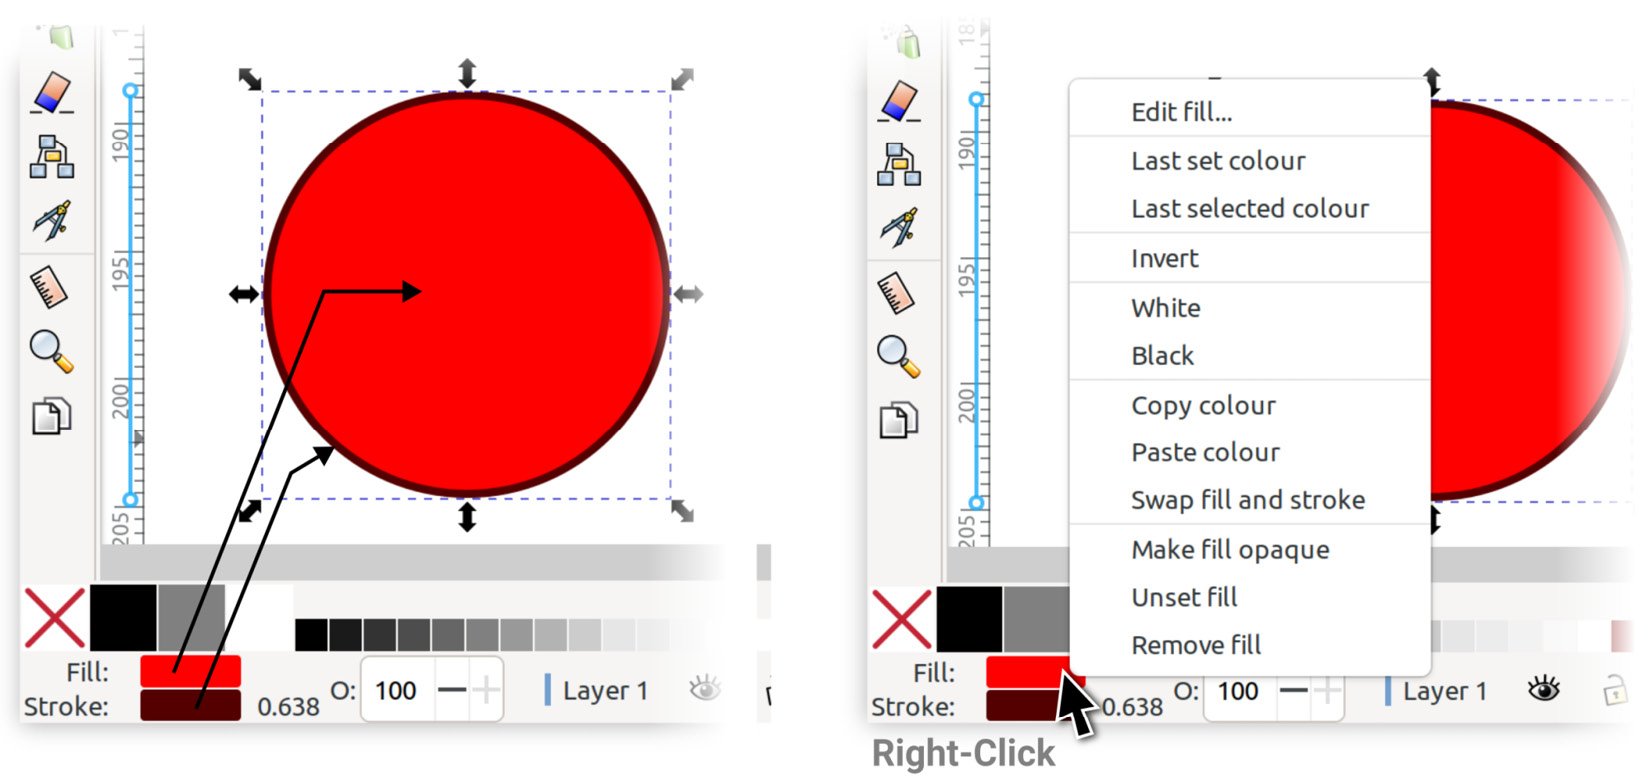
Figure 1.18 – Fill and stroke indicators (left) and the options you get after right-clicking the Fill or Stroke color bars (right)
Next to the Stroke color bar is a number representing the stroke’s width (0.638 in this case). Clicking that number will open the Stroke Style tab in the Fill and Stroke dialog, where you can change its value.
The O: value to the right of the stroke’s width in the box is the opacity value, which controls the transparency/opacity of the selected object. This value corresponds to the opacity slider at the bottom of the Fill and Stroke dialog. You can use either one to change this opacity value.
Those are the basics of the color indicators, but you’ll notice there are more options directly to the right. Let’s see what the Layer Info Indicator is all about, shall we?
The Layer Info Indicator
These are just a few quick-access tools (see Figure 1.19) for working with the currently selected layer or group. These controls are also available in the Layers dialog and Objects dialog, which we will discuss later:
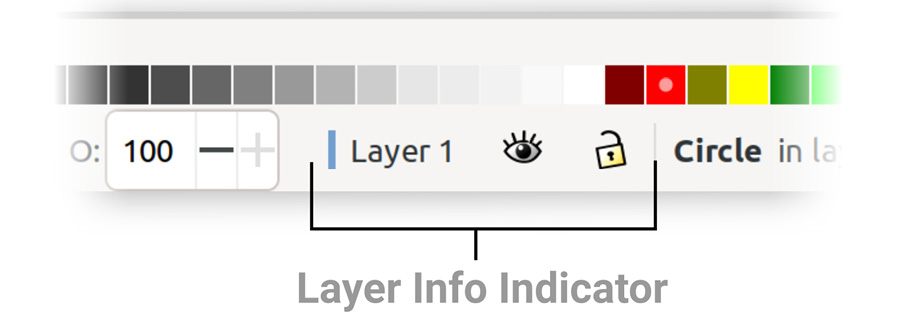
Figure 1.19 – Layer Info Indicator
Clicking the Eyeball Toggle icon will hide or show the current layer or group, and the Lock Toggle icon will lock or unlock it. Locking a layer means you cannot select it, which is nice for working on top of background shapes that you don’t want to accidentally select. You can also click the layer name, and the Layers and Objects dialog will appear with the current layer and object selected.
Further to the right is a space filled with a message – this is the Status bar.