

Clips and clipping groups
We got to play with clips a little in the last chapter when we used them to clip our blur, making a hard edge at the bottom of our shape to get rid of what looked like a shadow. Let’s take another example. Say we want to subtract the background from an image. This is a common photo editing task that we can do right in Inkscape with vector precision!
As you can see in Figure 9.1, we can use our Bezier Curve tool to trace the periphery of this fetching mannequin and select both the shape and the picture, but instead of Object > Clip > Set Clip, as we did before, we’re going to right-click on our selected objects and just choose Set Clip from the context menu that pops up. Easy, right?
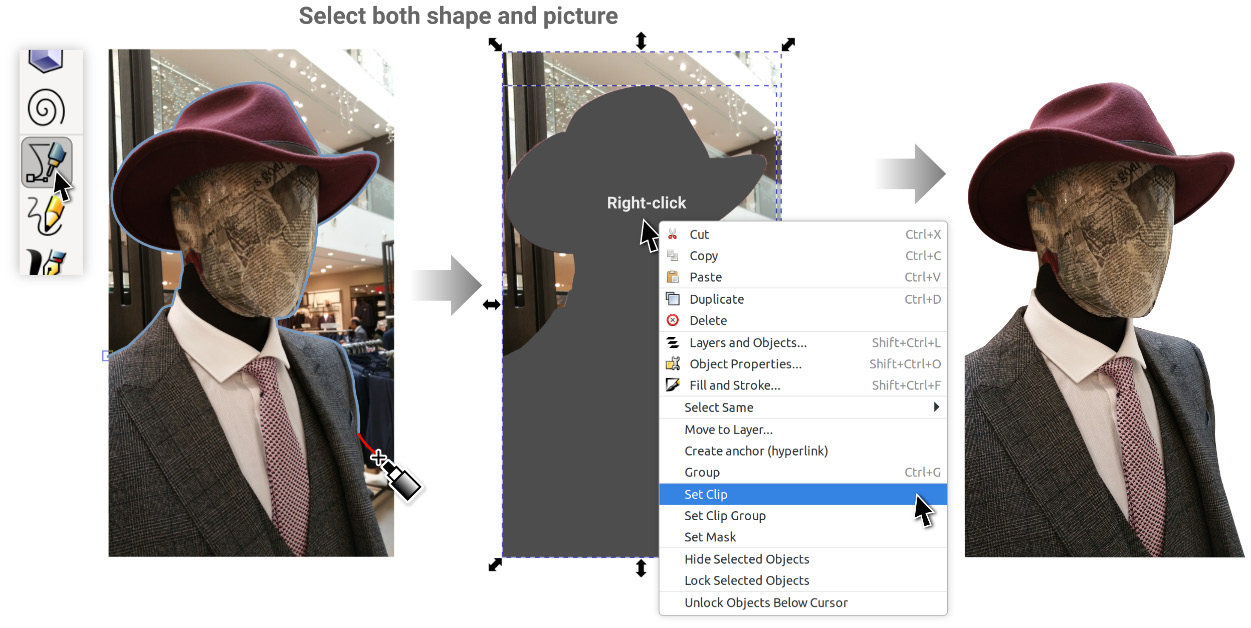
Figure 9.1 – Using the context menu (also known as the right-click menu) to set a clip
Note that there are other clipping options in that context menu, but before we dive too deep, let’s explore some neat tricks...